Thursday, June 5, 2008

waist armor

During my move to the new house, several items got lost. One of them is the waist armor. The one I built to replace the old one doubles as saber holders.
Photobucket
Since the height of the MS has increased significantly I extended the waist armors with binders to match the proportion.
Photobucket
The only problem I had was the exposed polycap, so I build extra panel extending out from the waist to cover the top of the polycap. This limited the posebility of the armor somewhat, but should not be a hindrance to the legs.
Photobucket
Photobucket
Finally, scribing on the back waist armor followed by a thin plastic sheet with openings that exposes the panel lines creates the multilayer details. Many uses similar concepts the detail up the interior of the waist armors such as this example from Keita.
Photobucket

I think 95% of the construction is complete. Here is an overall shot.

Photobucket

Thursday, May 8, 2008

Head

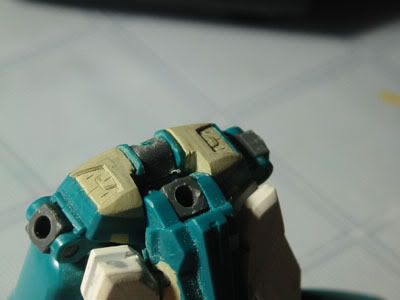
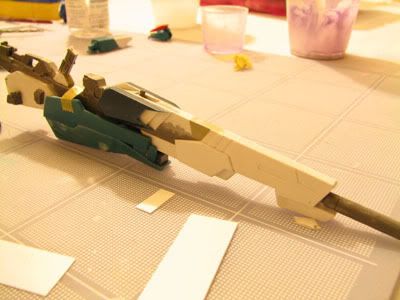
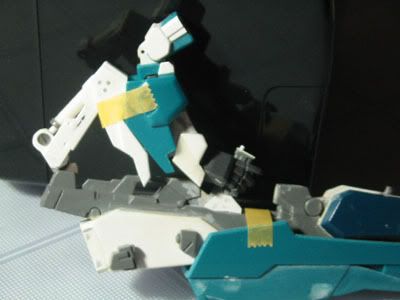
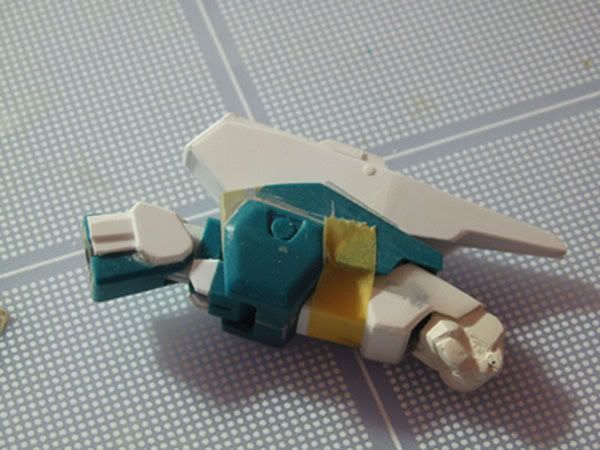
The head of the Gaplant is surrounded by the shoulder and the backpack. The spacing is very tight around the head. When the model is in MA mode, the backpack actually move in on the head about 4mm, making the space even tighter. The overall look of the original head was decent. The separable visor and the mouth piece were inviting me to modify it.

I first trim down the pointy mouth piece and modify it into a chin. 0.25mm plaplate is used to build up a nose and outline the chin and the eye area.

Photobucket

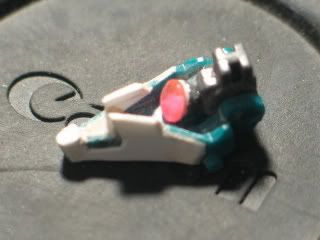
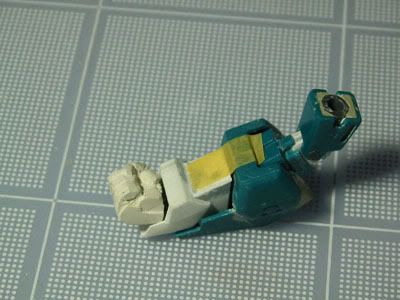
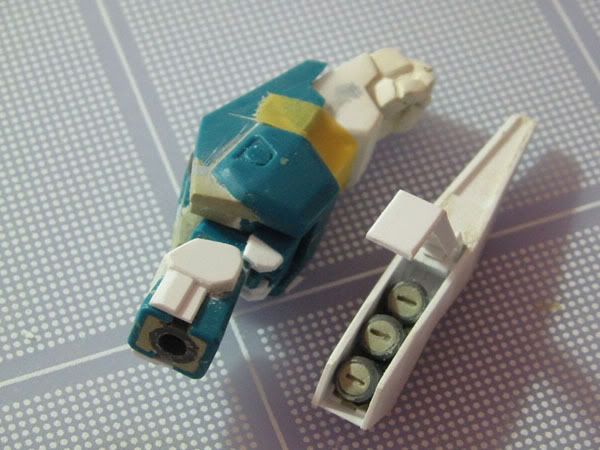
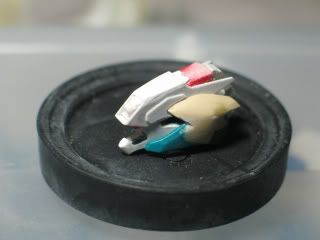
Plaplate are used to build around the visor to turn it into a housing for optics. I have no idea why I added the details to the optic tube. Most of the surface is not visible. I just want to see if thin plastic strips can simulate the wiring details. The optic tube is insert into the housing and a SP eye lense from Mecha Skunk will be glued on during the assembly.

Photobucket

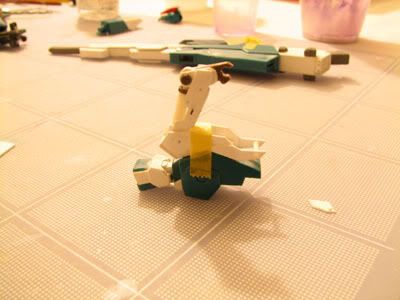
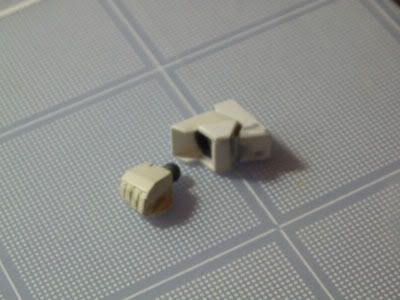
During the moving to my new home, the piece for the back of the head was lost. I had to scratchbuild a new one. This allows me to add a few mm of length to the head. I like to imagine it as processing unit for the optics. Basically it is built from stacking vertical plaplate together. Once the plaplate piece is built, it still leaves some gaps when attach to the head. I painted vaseline on the head, then stick a glob of epoxy putty to the processing unit and jam it into the head. Excess epoxy be squeezed out through the gaps between the head and the processing unit. The processing unit with epoxy can be pried off the head because I painted the head with Vaseline. Trimming off the excess leave me the unit with the gaps filled.

Photobucket

I cut a plastic tube to make the connectors for two snake chains that will connect the processing unit to the body. This is what it look like when everything is put together.

Photobucket

It reminds me of Cima's pilot helmet. Maybe I will post a screen capture for comparison.

Wednesday, March 12, 2008

Photobucket

Continuing with the FFS theme, I added high heels to the feet. This adds 9mm to the over all height. Details are added to the front of the feet. One of the distinct feature of the FFS resin kit is the incredible mechanical details under the feet. As you can see there is still alot of flat space left to work on.

At first the detailing seems intimidating. After study pictures on the web, I realize most of the detailing can be accomplished by gluing plastic cards in vertical orientation and fill up as much space as possible. It takes an afternoon of cutting small parts, losing small parts, cutting small parts and gluing small parts. All I can say is my neck hurts.

Photobucket

Tuesday, August 28, 2007

Waist

I did not use the waist block to make the robot skinner. This leaves openings on the waist, which is filled with Milliput sculpted with some details.

Photo Sharing and Video Hosting at Photobucket

The front skirt armors serves as canards in MA mode. They are attached to the crotch from the side, instead of attach to the waist. The canards folds back and locks the armor in the forward direction when in MA mode.

Photo Sharing and Video Hosting at Photobucket

Photo Sharing and Video Hosting at Photobucket

Right arm and rifle

The right arm has similar construction except I build a mechanical arm at the elbow to connect with the rifle.
Photo Sharing and Video Hosting at Photobucket
When not in use, the arm folds into its housing.

The long rifle is carried underhanded with the help from the elbow arm. It is a bash from the wing gundam rifle. I glued plastic cards to modify the exterior. When transformed into the MA mode, the rifle can be stored under the MA. The handle is inserted to where the model stand would go. In order for the model to use the stand when in MA mode, I removed the front part of the booster and attach it to the gun.

Photo Sharing and Video Hosting at Photobucket

Photo Sharing and Video Hosting at Photobucket

Monday, August 13, 2007

Left Arms

I milliput cast the HDM for gundam NT to get the hand. Scratchbuilt new lower arms.

Photo Sharing and Video Hosting at Photobucket

The elbow joints are double jointed. I removed the piping that connects the elbow to the upper arm since they will hinder mobility of the double joints.

Photo Sharing and Video Hosting at Photobucket

Now that the shields are mounted on the shoulders, the elbows are free for other stuff. Some of you Five Star Stories fan might recognize where it comes from.

Photo Sharing and Video Hosting at Photobucket

It also acts as a small missile pod.

Photo Sharing and Video Hosting at Photobucket

At this point it might be a good place to do a sanity check to see if the whole thing is transformable. Yep it does.

Photo Sharing and Video Hosting at Photobucket

Monday, August 6, 2007

upper body

I hated the original chest. I changed the design to a more FSS type of design. In fact, the inspiration came from the Last Junchoon discussed in this forum thread.

Last Junchoon

I glued a few pieces of plastic sheets to the chest as guide and filled in with epoxy putty. Here the milliput comes in handy since the surface can be smoothed with water. Once the putty cured, I only have to sand a little bit.

Photo Sharing and Video Hosting at Photobucket

A bit of scribe and knife works adds some more details to the chest.
Photo Sharing and Video Hosting at Photobucket

Since I mod the chest close to FSS design, I wanted to mod the waist to follow. Making the whole snake skin style waist would be crazy. I have some ideas of how to go about it, but that will be a different project. I just thin down the waist by not attaching the waist block. Where it use to be I turned it into exhaust(heat) vents.

Photo Sharing and Video Hosting at Photobucket